![]() Windows Server 2019 Standard is a powerful operating system designed for businesses of all sizes. Whether you’re setting up a new server or upgrading your infrastructure, this guide will help you download, install, and activate Windows Server 2019 Standard step by step. We’ll also show you how to get a lifetime product license at an affordable price.
Windows Server 2019 Standard is a powerful operating system designed for businesses of all sizes. Whether you’re setting up a new server or upgrading your infrastructure, this guide will help you download, install, and activate Windows Server 2019 Standard step by step. We’ll also show you how to get a lifetime product license at an affordable price.
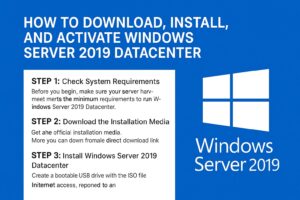
Step 1: Check System Requirements
Before you start, make sure your hardware meets these minimum specifications:
| Component | Minimum Requirement |
|---|---|
| Processor | 1.4 GHz 64-bit processor or faster |
| RAM | 2 GB (Server with Desktop Experience: 4 GB) |
| Storage | At least 32 GB of available disk space |
| Network | Gigabit Ethernet adapter |
| Display | 1024 × 768 resolution or higher |
| Firmware | UEFI 2.3.1c-based system and firmware with Secure Boot support |
| Internet | Required for downloading updates and activation |
Tip: Run all Windows updates before installation for a smoother setup.
Step 2: Download the Installation Media
You can download the official installation media directly from Microsoft.
However, if you purchase a Windows Server 2019 Standard license from us, we’ll provide you with a direct download link for the ISO file—making the process even easier.
Product link:
Buy your Windows Server 2019 Standard License Key (Lifetime)
Step 3: Install Windows Server 2019 Standard
Create installation media
Use the ISO file to create a bootable USB drive (use tools like Rufus).
Boot from the USB drive
Insert the USB into the server, restart, and boot from USB.
Begin the installation
Choose Windows Server 2019 Standard (Desktop Experience if you need GUI).
Partition your disk
Select your disk and allow the installer to format it.
Complete setup
Follow on-screen prompts to set admin password and initial settings.
Step 4: Activate Windows Server 2019 Standard
 Once the installation is complete, activate your product with the genuine license key:
Go to Settings > Update & Security > Activation.
Click Change product key.
Enter the Windows Server 2019 Standard license key you purchased.
Wait for Windows to verify and activate.
That’s it—you now have a fully licensed Windows Server 2019 Standard!
Why Choose a Genuine License?
Lifetime activation — no subscriptions or recurring costs.
Guaranteed updates — stay secure with official Microsoft patches.
Better performance and reliability — avoid the risks of counterfeit keys.
Final Thoughts and Call to Action
Setting up Windows Server 2019 Standard doesn’t have to be complicated. By following these steps, you’ll have your server installed, activated, and ready to handle your business workloads.